
I’ve restructured, cleaned up, and reworded everything for your theme “Omniverse”, keeping it professional, documentation-ready, and easy to read. You can directly use this on your website, docs, or marketplace page.
Getting Started with the Omniverse Theme #
Everything you need to know to get started with the Omniverse WordPress theme—from installation and initial setup to customization and advanced features. This guide is ideal for both beginners and experienced users switching to Omniverse.
Requirements & WordPress Setup #
Before installing Omniverse, make sure your hosting environment meets the following requirements:
- PHP version: 7.4 or higher
- WordPress: Latest stable version
- HTTPS: Enabled (SSL required)
Proper WordPress configuration is essential for smooth theme performance and updates. Ensure your server meets these requirements before proceeding with installation.
Theme Installation Process #
You can upload and install the Omniverse theme in two ways:
- Via WordPress Dashboard (recommended)
- Via FTP
Installing via WordPress Dashboard #

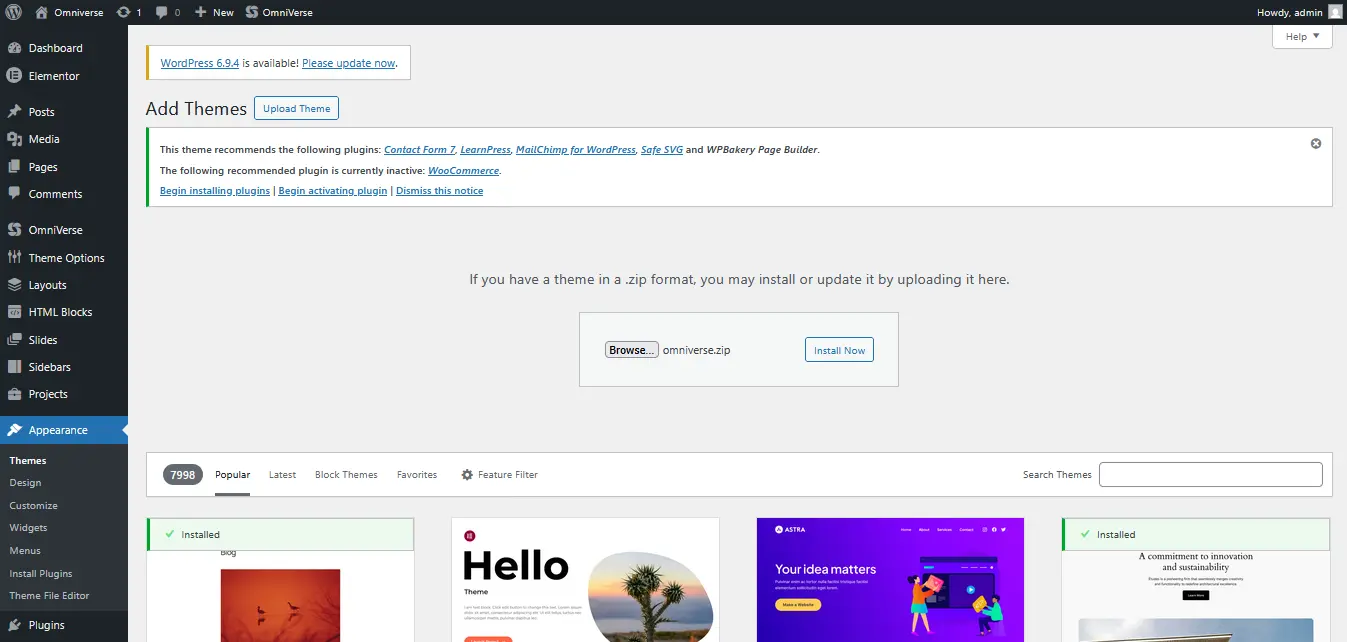
- Go to Appearance → Themes → Add New
- Click Upload Theme
- Select the
omniverse.zipfile - Click Install Now
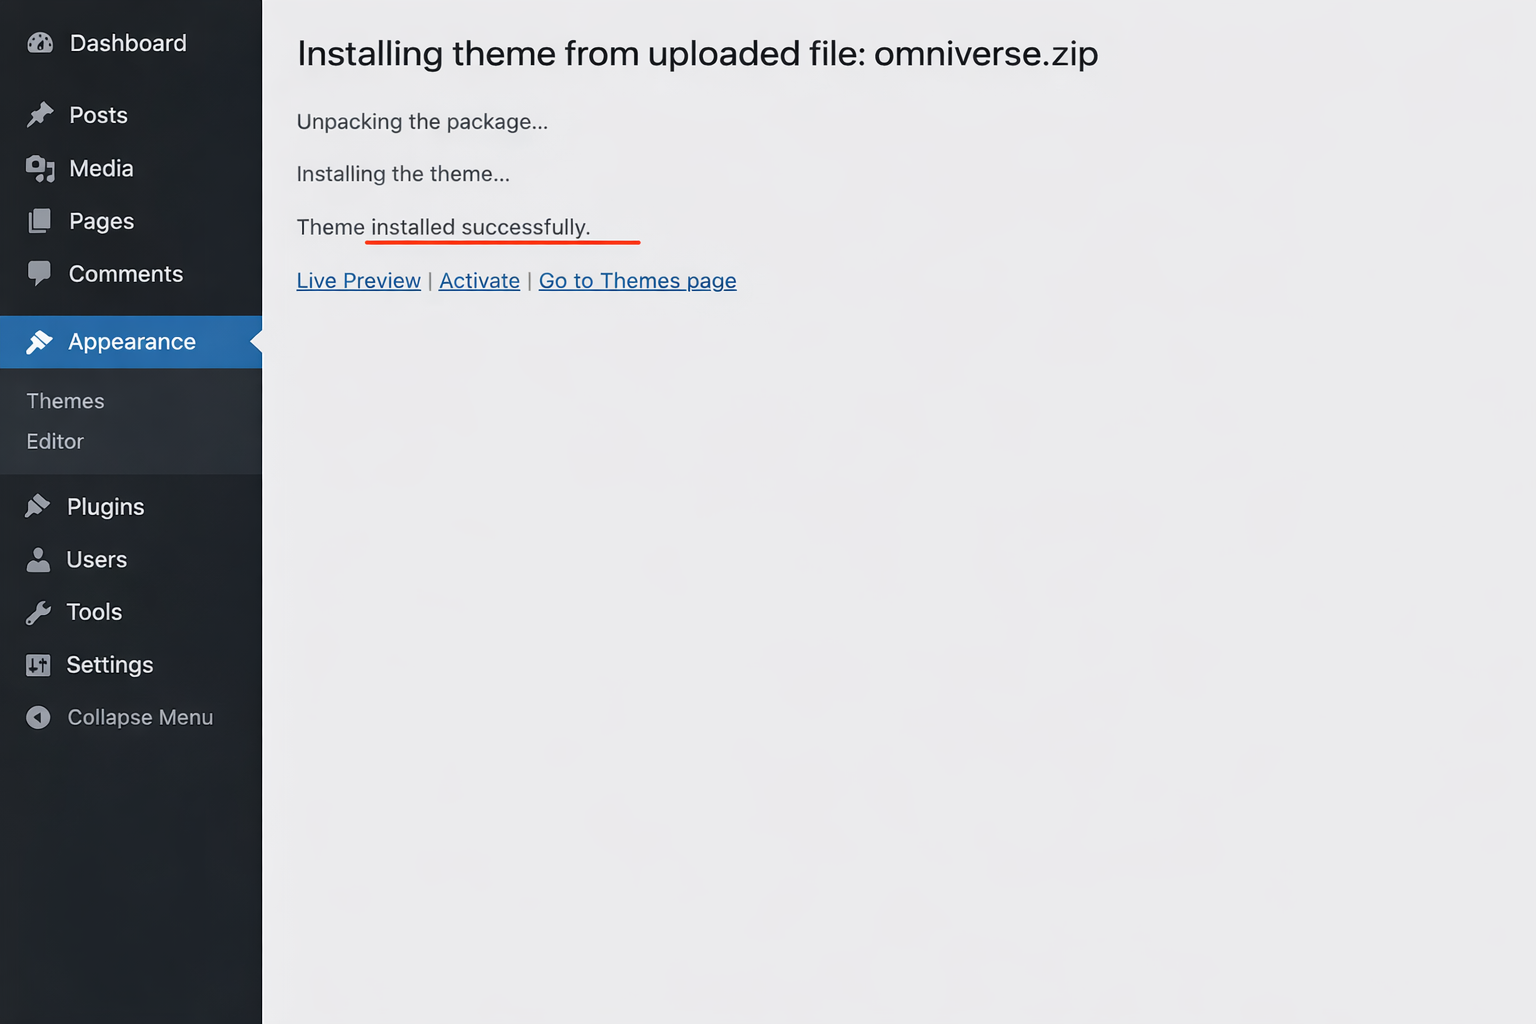
- Once installed, click Activate
After activation, the Omniverse Setup Wizard will automatically start.
Omniverse Setup Wizard #
Click “Let’s Start” and follow the guided steps below:
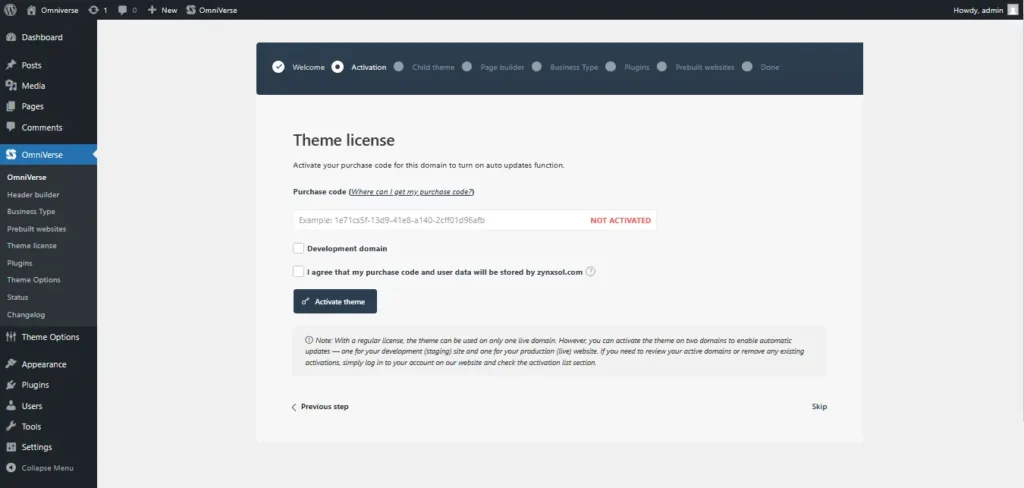
Step 1: License Activation #
Activate your license to enable automatic updates and full features.
You may skip this step and activate the license later.
- Enable Development Domain if this is a staging site
- Disable it for live production websites
Step 2: Child Theme #
Install a child theme to safely customize Omniverse without losing changes during updates.
Click “Install Child Theme” to create and activate it automatically.

Step 3: Page Builder Selection #
Choose your preferred page builder:
- Elementor
- WPBakery
Demo content will be installed based on your selected builder.

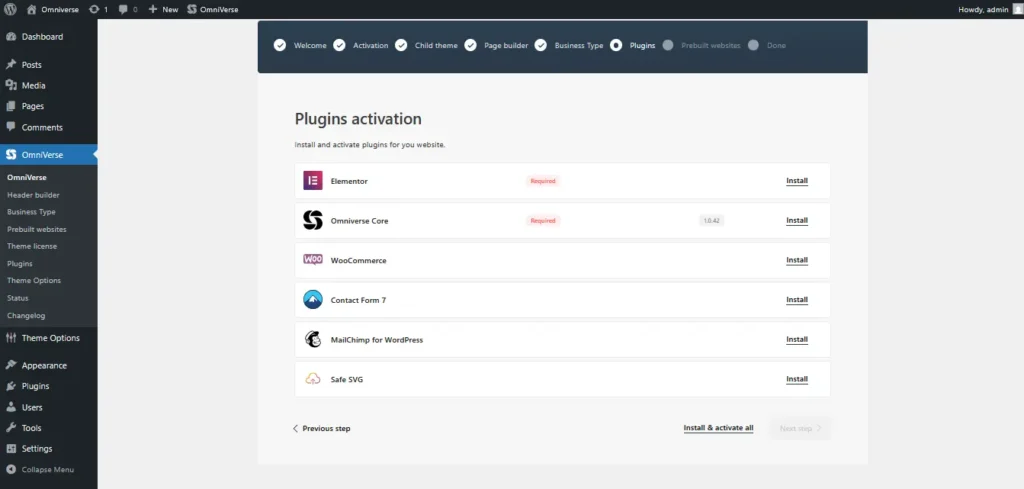
Step 4: Plugins Activation #
Install required and recommended plugins:
- Install individually, or
- Use “Install & Activate All” for faster setup
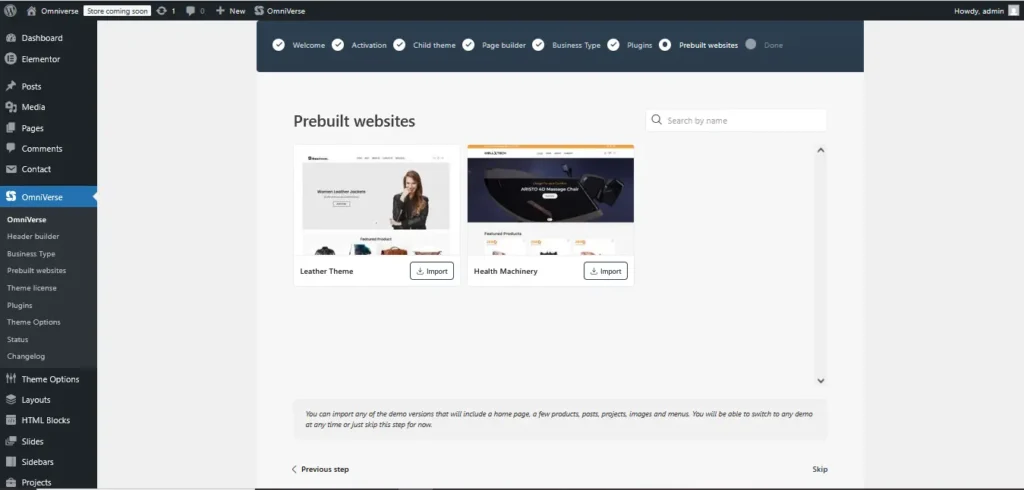
Step 5: Prebuilt Websites #
Choose from multiple professionally designed demo websites.
- Import a demo now, or
- Skip this step and customize manually later
You can switch demos anytime.
Step 6: Setup Complete #
Once demo import is finished, you’ll see a success message.
Options:
- Start Customizing
- Close and View Website
Your Omniverse theme is now ready 🎉
Theme Configuration & Key Features #
After installation, explore Omniverse’s powerful customization tools.
Header Builder #
Omniverse includes a drag-and-drop Header Builder that lets you visually design headers in real time.
Features:
- Add elements using the plus (+) icon
- Rearrange columns easily
- See live frontend changes while editing
Adding a Logo #
Use the Logo element inside the Header Builder to upload and adjust your brand logo, including size and alignment.
Menu Creation #
Create or edit menus via:
Appearance → Menus → Create a New Menu
You can also modify demo menus by changing:
- Menu title
- Layout
- Mega menu options
Footer Configuration #
Omniverse offers flexible footer layouts with predefined column structures.
Options:
- Use built-in footer layouts
- Create a custom footer using HTML Blocks and your page builder
Each footer layout automatically creates widget areas in WordPress.
Typography Settings #
Control all fonts through:
Theme Settings → Typography
Features:
- Organized font groups
- Global and section-specific typography control
- Advanced font customization options
Product Management (WooCommerce) #
After setup, start adding products to your store using WooCommerce.
Supported product types:
- Simple
- Variable
- Grouped
- External
Enhanced Variations #
Omniverse includes advanced variation swatches, replacing standard dropdowns with:
- Color swatches
- Image swatches
- Text labels
Advanced Layout Builder #
Omniverse provides a custom Layout Builder for WooCommerce and content pages.
Create layouts for:
- Shop page
- Single product
- Blog & single post
- Cart, Checkout, Thank You page
- Projects & archives
Access via:
Dashboard → Layouts → Add New
You can also import prebuilt layouts.
Built-in Slider Functionality #
Omniverse includes a lightweight slider system:
Dashboard → Slides → Sliders
Benefits:
- High performance
- Easy configuration
- No need for third-party slider plugins
Create and manage slides quickly for banners and hero sections.
Next Steps & Additional Features #
Now that Omniverse is installed, explore advanced tools to grow your store.
Performance #
- Speed optimization
- Improved page load times
Translation & Multilingual #
- Translate theme text
- Enable multilingual websites
Product Enhancements #
- Product labels & badges
- Stock progress bar
- Visitors counter
- Product videos
- Linked variations
- Show single variations
Sales & Marketing #
- Frequently bought together
- Dynamic discounts
- Free gifts
- Delivery estimation
- Waitlists
- Abandoned cart recovery
Integrations #
- Facebook login
- Google login
- Instagram feed integration


